
2500+
Successful Projects

The ecosystem for front-end development has experienced a boom in new frameworks and tools in recent years, all aimed at enhancing the developer experience. One of them is Vite, a relatively recent addition that has become well-known for its remarkable speed and performance. Evan You, the man behind the Vue.js framework, created it to make current web project development faster. The nicest part about Vite is that it can be used to create JavaScript and Typescript apps since it is platform-agnostic.
This post will provide a thorough introduction to both Vite vs. Create React App, including their key features, alternatives, and setup instructions.
Table of Contents

Developed by Evan You, the person behind the open-source JavaScript framework Vue.js, Vite is used for front-end development.
A build tool called Vite (pronounced/vit/, the French word for “fast”) seeks to make current web project development faster and more efficient. It is divided into two main sections:
A development server offering several feature improvements over native ES modules, such as lightning-fast Hot Module Replacement (HMR)
A build tool that preconfigures Rollup to produce highly optimized static assets for production and bundles your code with it.
Qualities:

An open-source JavaScript package called React.js is used to create user interfaces, especially for one-page apps. It is used in managing the visual layer of mobile and online applications. We can also design reusable user interface components using React.
Facebook created ReactJS, an open-source JavaScrpt toolkit, to let developers quickly and effectively create engaging and rich online applications with little to no code. Getting the greatest rendering performance is the main goal of ReactJS. Its power stems from its attention to detail. ReactJS enables a developer to divide the intricate user interface into more manageable components rather than working on the whole web application. As an authoring tool, Vite is completely agnostic, and as we will see below, the tool itself instructs us on how to develop a React application.
Because Create React App is supported by the people who created the most well-known front-end application development library, React, it is used in the great majority of applications. In React’s documentation, CRA is the default option. Since many developers haven’t looked at other JavaScript app build tools, this default choice is still in place for them.
However, there are more advantageous options. At Makimo, the majority of our applications –if not all of them –are being moved to Vite install. I will explain why we agreed to take on his responsibility in the piece below.
We will also go over the Create React App’s restrictions. While you can establish a functional project with only one command with CRA, Vite ended up being a superior option because of its configuration constraints and the bundler that it uses. CRA is a very basic tool for creating JacaScript applications.
An addon called CRA (Create React App) eliminates the need to set up Webpack, one of the most widely used bundlers. Webpack does not get any new features from CRA. Conversely, it reduces the pool of options, which makes it a secure option for novice coders.
Vite was switched from CRA mostly for speed reasons. Compared to the Webpack used in CRA, Vite employs the build bundler, which is far quicker. Its speed is a result of being built in Go, a multithreaded language that compiles quickly. In contrast, Webpack is written in JavaScript, which is interpreted and single-threaded, making it slower.
We replaced CRA with Vite in a smaller project, and the build time of the application was almost halved. We decreased from 28.4 to 16.1 seconds. Any kind of automation, like GitHub Actions, where we pay for each minute used, is where we see the most time savings.
Additionally, the local server begins significantly quicker. While Vite completes the identical operation in only 390 ms, CRA begins the same project in 4.5 seconds. This results in considerable time savings. The changes may not be apparent when a single developer works on a project, but when we consider the larger picture, the savings are already far higher.
While the cost reductions from early builds and deployments are certainly nice, there’s more. We often employ “hot reload” during development, which involves reloading the programme after every modification as it’s being written to ensure that it reflects the changes as soon as possible. After every save in CRA, we had to wait about five seconds for the view to change. This occurs very rapidly in Vite, which improves productivity and enjoyment of development while avoiding distractions while waiting to construct the application, which drastically alters the caliber of work.
Although saving a few seconds every time may not seem like much, the difference becomes more apparent when considering a huge application that may take several minutes to construct.
These are a few other projects that we have revised:
Project 1 | Project 2 |
Production build | 28.4s -> 16.1s 107s -> 36.2s |
Developer mode | 4.5s > 0.390s 7.4s -> 0.365s |
Hot reloading | 5s -> tens of ms 4 -> tens of ms |
It takes little time at all to move the application to Vite. With the abundance of online instructions that walk you through the process, you can effectively move your app in less than a day. This one, which I have used firsthand, is https://dev.to/wojtekmaj/migrating-your-react-app-from-webpack-to-vite-inp.
Because CRA does not need setup, it has been favored by many. Its primary benefit is that a React application can be launched with only one command, but flexibility is lost in the process. You will undoubtedly see that bigger projects need the addition of additional CRA capabilities.
The hacking of CRA’s flaws starts when a functionality is not supported. For instance, installing CRACO rather than CRA itself is required to restore Webpack’s configuration file, which restricts our use of CRA to version 4.
On the other hand, rollup.js, a well-liked new tool that makes it simple to create Rollup plugins and add missing features, was taken into consideration while developing Vite’s plugin support. Because Rollup offers a much bigger ecosystem of plugins, you may customize the environment to better suit your requirements.
We employ a variety of frameworks throughout the firm, including React, Vue, and Svelte. CRA restricts its functionality to React alone. We would have to start from scratch when learning a new tool to create apps in a different framework. Even though Vite was developed by the people who built Vue, it lets us customize Vue, react, and less well-known frameworks like SolidJS, Svelte, or Lit. We save a tonne of learning time and make the projects more cohesive by utilizing Vite for every project, which makes it easier for new members to join.
Additionally, SSR Vite comes with built-in support for server-side rendering, which is becoming more and more common and involves creating portions of a page on the server side, which speeds up and improves user experience on the website.
In order to avoid becoming caught in the vicious cycle of periodically switching tools, we began exploring well-developed alternatives with a sizable user base and contributors. Previously, we utilized a solution called Snowpack, but sadly, the project is no longer supported.
On the other hand, Vite has a big and generally stable ecology. It has 2.5 million downloads on npm Vite on average every week. On average, updates are issued once a month, and bug fixes are continuously being worked on by the community.
However, the most significant benefit is increased speed while developing applications. You risk being distracted and losing attention even for a short period of time while you are waiting for an application to reload in your browser. And in a day, this may occur hundreds of times. We have never seen such an issue with Vite.
It’s appropriate to use Create React App to develop your first basic React application. When making an app, it makes sense to go with a more customizable tool since you will soon see its limits.
Usually, you would use the Create React App to start a new project, but installing over 140 MB of dependencies might be a time-consuming process. Vite is a little utility with 31 MB of dependencies, which will reduce the amount of time needed to launch a new project. Additionally, Vite links to JavaScript files using the browser-native ES (ECMAScript) modules, which do not recompile the whole bundle with every file modification. Because of these modifications, developing, upgrading, and building a React app with Vite is quicker.
Using the Vite tool, this article will create a new React application. Using a new component, CSS, and an image file, you will develop a simple application and optimize the bundle before deploying it.
Use the DigitalOcean App Platform to streamline the deployment of React apps. Within minutes, deploy React straight from GitHub.
In this step, you will use the Vite tool from the command line to create a new React project. The yarn package manager will be used for both script installation and execution.
In your terminal, type the following command to scaffold a new Vite project:
Using this command, the remote npm repository's Vite executable will be launched. It will set up the tools required to construct a local development environment for React. Ultimately, a command-line menu with project settings and language type options will appear.
Once the script runs, a project name entry screen will appear.
Type your project name (this tutorial will use digital-ocean-site as the example name):
After entering your project name, Vite will prompt you to select a framework:
Vite allows you to bootstrap a range of project types, not just React. Currently, it supports React, Preact, Vue, Lit, Svelte, and vanilla JavaScript projects.
Use your keyboard arrow key to select React.
After selecting the React framework, Vite will prompt you to choose the language type. You can use JavaScript or TypeScript to work on your project.
Use your arrow keys to select JavaScript:
After setting up the framework, you will see an output that the project has been scaffolded. Vite will then instruct you to install dependencies using Yarn:
Navigate to your project folder as directed:
Then, use the yarn command to install the dependencies of the project:
When finished, the dependency installation will return an output with how long it took to install dependencies:
You have now set up a new React project using Vite and installed the packages required by React and Vite.
Next, you will start the development server to test the application.
In this step, you will start the development server to verify that everything is working.
From inside the digital-ocean-vite folder, use the following command to run the development server:
This command is an alias of the vite command. It will run your project in development mode.
You will receive the following output:
Next, open your browser and visit http://localhost:5173/. The default React project will be running on port 5173:
When you see this app running, you have successfully installed React with Vite. Next, you will preview your app from your mobile phone.
Vite does not expose your development application to your network by default. In this step, you will expose the app to your local network to preview it from your mobile phone.
To run your app in your local network, you have to stop the current server first. In your terminal, use CTRL+C to terminate the currently running development server.
Next, use the following command to run your project:
The --host flag tells Vite to expose your app to the local network.
You will receive this output in your terminal:
This is a local IP address, unique to your computer network or router.
Open a browser on your mobile phone, then type in the above IP address and port to access the preview of your Vite app from your mobile phone:
You have now run your app in the development environment and verified it works. In the next step, you will remove the boilerplate code that came with Vite.
This step will let you build up a new application by removing the Vite project's boilerplate files from the src/ directory. Additionally, you will get acquainted with the current app's default project structure.
Use the following command to view the contents of your src/ directory:
The output will list all available files:
Use the rm command to delete a file or directory. Use the following commands to delete the default files from the project:
Delete the assets directory using the following command:
The -r flag is a recursive operation, required when deleting a directory along with its contents.
After deleting these files, only main.jsx remains in the src/ directory. Run the ls src/ command again to see the remaining files:
Now, the directory will only contain the main.jsx file:
Because you have removed all other files, you now need to remove a reference in main.jsx to a deleted CSS file.
Open main.jsx for editing with the following command:
Remove the highlighted line to unlink the reference to the CSS file:
Save and close the main.jsx file.
Create a new file named App.jsx under the src/ directory with the following command:
Add the following code to the App.jsx file:
This code creates a new functional React component called App. The export default prefix tells JavaScript to export this function as a default export. The function body contains a <div> with Hello World text.
Save and close the App.jsx file.
Use the following command to run the development server again:
Now, open or refresh http://localhost:3000 in your browser to access a blank page displaying the Hello World text:
In this step, you removed some of the default files from the Vite project. Next, you will build a basic app with new components, CSS files, and image files.
In this step, you will create components, add CSS files, and link to images by creating a basic app. Start by exiting the development server.
In the following sub-section, you will create a new component for your React App.
Creating a Component
Creating a new component adds modularity to your project. You will add all of the components into the components directory to keep things organized.
Use the following command to make a new directory called components within src/:
Next, create a new file called Welcome.jsx inside the src/components/ directory with the command:
nano src/components/Welcome.jsx
Add the following code to the Welcome.jsx file:
The above code will create a new functional React component called Welcome. The export default prefix tells JavaScript to export this function as a default export.
The div tag with a class name of wrapper allows you to target this section in the CSS. The h1 and p tags will display the message on the screen.
Save and close the file.
Next, you will reference this new component in your App.jsx file.
Open App.jsx with the following command:
Update the contents of App.jsx with the highlighted code:
This line of code will import Welcome.jsx into the app and link the new component into the function body. When finished, save and close the file.
In the following sub-section, you will add an image to your app.
Adding an Image
Adding images in React is a common use case in app development.
Create a new directory called img under the src/ directory with the following command:
Navigate to your src/img directory with this command:
You will download this image of Sammy into src/img.
Download the image with wget:
Rename the image with the following command:
This command renames the image file from small-profile.jpeg to sammy.jpeg, which will be easier to reference later.
Return to your root directory with this command:
Next, you will update the Welcome.jsx file to link to this image. Open the file:
Update your Welcome.jsx file by adding the highlighted lines:
The first line will import the image into React as a module.
The other line inside the function body will create a new <img> tag and link the src attribute to the image component you just imported. The width and height props will set the corresponding image attributes to 200 pixels.
Save and close the Welcome.jsx file.
Next, you will add CSS to your project.
Adding CSS
In this sub-section, you will add a custom CSS file to your project to style your app.
Create a new directory called css under the src/ directory using the following command:
Now, create a new CSS file called main.css in src/css:
Add the following code to the main.css file:
In the above CSS, you set a grid display and place items in the center of the body. You also set a font family and background color.
The .wrapper class will select the wrapper div in your Welcome.jsx file. Styles for this class will do the following:
The h1 selector will target the tag in HTML, setting its color to a shade of purple.
When finished, save and close the main.css file.
Next, you will reference the new CSS file from the Welcome.jsx component. Open the Welcome.jsx file:
Update the contents of the file with the highlighted line:
This line will import the CSS file as a module in your component. You may need to update the line with the correct file path for your project folder.
When finished, save and close the Welcome.jsx file.
In the following sub-section, you will change the app title bar of your app.
Changing the App Title Bar
By default, create Vite app displays the text Vite + React in the browser window title bar. In this step, you will change it to a descriptive title.
Open index.html in your root directory:
Update the <title> tag with the highlighted text:
This text replaces the default Vite App title bar with your custom app title.
Save and close the index.html file.
If you need to rerun the development server, run this command:
After all these changes, visit http://localhost:5173 to view your app. You will see a new version of your app.
You can close the development server when you’re ready to move on to the building.
You have now added an image, changed styles, and made a polished UI. In the next and final step, you will build an optimized app bundle for deployment.
In this step, you will build an optimized app bundle ready to deploy to a server. To create a build, run the following command into the terminal:
This command creates a new dist folder with minified source files that you can deploy to your server for production
You will receive an output similar to this:
You can now deploy the contents of the dist folder to a server online. If you have an Apache or Nginx server, you can upload the contents manually. You can also use an app platform to run the build script and generate the build files automatically.

A recent addition to the frontend framework market is Vite. Vite is an all-purpose tool that works with projects from a variety of tech stacks and can now handle Preact, React, and Vue templates.
Pros
Cons

Gatsby is an open-source, free React framework designed to help web developers create productive apps and websites. To put it simply, Gatsby is a static site generator that makes use of React. Gatsby allows developers to create fast, secure, and reliable websites with its React-based framework and state-of-the-art data layer, which makes integrating different content, APIs, and services into one online experience reasonably easy.
Pros
Cons

The best place to start is with Create Next App. If a somewhat more complicated need, such as server-side rendering or static site construction, is needed. Using Create Next App is a reliable method to bootstrap a generic SPA with client-side rendering. It is a straightforward CLI tool for the Next.js programme launching.
Pros
Cons
Another tool that should be considered when beginning a React Project is React boilerplate. On its main page, React-boilerplate positions itself as the rapid web app of the future and states that its software may be used without a network connection.
Pros
Cons
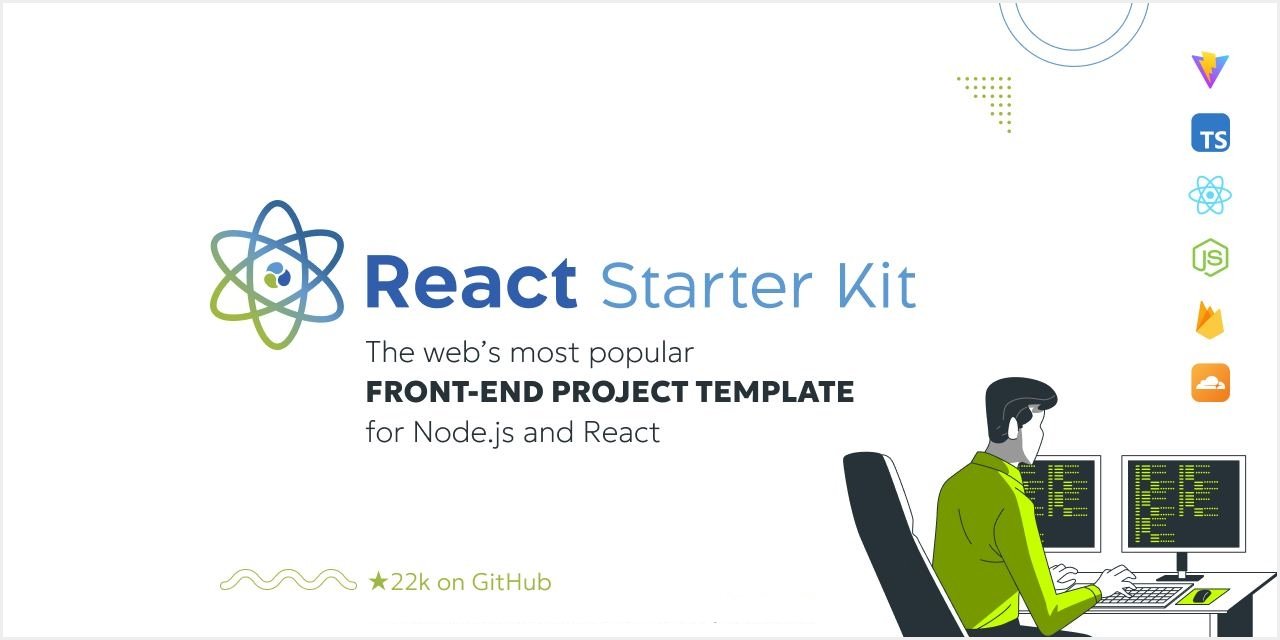
This is React Started Kit; it calls itself a boilerplate for isomorphic web apps. Let’s have a look. Before we get too far, it’s crucial to remember that React Starter Kit’s website characteristics it as “very opinionated,” implying that it has already chosen our tech stack –Node.js, Express, and GraphQL –for us.
Pros
Cons
Ultimately, the selection of an appropriate tool is contingent upon its suitability for the particular use case, irrespective of any shortcomings. This is the reason why, even in the face of better options like Vite, tools like Webpack still have a prominent position in the development environment.
It might be difficult to switch to new tools since there is no assurance that they will be kept up to date over time. One tool that was discontinued was Snowpack; however, it was purportedly died to burnout rather than technological issues.
In contrast, Vite has amassed a sizable community of supporters and maintainers who are always working on the platform, making it unlikely to be abandoned at this time.
From the proven dependability of Webpack to the unparalleled performance of Vite, each tool has its advantages and disadvantages and is designed to satisfy a variety of project needs. Ultimately, be sure to carefully evaluate the unique requirements and limitations of your project before selecting which tool to utilize.


Mobile App Development
If you’re an avid sports lover, who knows the pain of missing out on your favorite game better than you? Fortunately, there are online streaming apps like Sportsurge, ESPN, and VIPLeague that let you watch live games anywhere, anytime. With technology taking over the entertainment industry, the business idea of developing an online sports streaming […]

Mobile App Development
Keeper AI is an advanced matchmaking service to help individuals find ideal partners for casual hookups, long-term relationships, and eventually marriage. It is a new-age dating site for serious relationships that uses artificial intelligence to find and analyze love connections. The platform offers more than just swiping algorithms. The platform uses AI algorithms to find […]

Mobile App Development
Application software is a specialized computer program users utilize on their devices for different purposes. These programs are designed to perform specific user functions, mainly web browsing, word processing, or gaming. For instance, you might use Google Chrome to browse the internet, a spreadsheet application to manage and organize data, or a graphic editing tool […]
Successful Projects
Years in Business
Happy Customers
We have been working with Mtoag Technologies for the past 5 years. They have been a very responsible team from the beginning. They are quick at responding, available whenever we need, and are extremely supportive when there’s a high-priority fix. All-inclusive, IAD can be your best bet for app development.